← Outdoor Survivalist Trainer Your area

First aid · First aid course

Feet and ankles: blisters and sprains

Your feet are how you get home. The survival manual gives a daily foot routine, a way to handle blisters that keeps them from becoming open sores, and RICERICE A memory aid for a sprain: Rest, Ice, Compression (a snug wrap) and Elevation (raise it above the heart). for a sprainsprain A stretched or torn ligament at a joint, often the ankle. Pain, swelling and bruising.. The first aid manual adds the splintingsplint A stiff support, like sticks or rolled-up magazines, tied along a hurt arm or leg so it cannot move. rules and how to check that a wrap is not too tight.

Why this matters

Your feet are how you get home. A blister that turns into an open sore, or an ankle you cannot walk on, can turn a short walk into a long night. The survival manual puts foot care with daily hygiene because problems are much easier to prevent than to fix.

Wet, cold feet are more than uncomfortable. The survival manual says trench foottrench foot Damage from wet feet at temperatures just above freezing for hours or days. Pins and needles, numbness, then swelling and pain. Dry socks prevent it. damages nerves and muscles, and in the worst cases the flesh dies. For a hurt ankle, the first aid manual says much depends on the first aid a person gets before they are moved.

If you have signalsignal Anything in threes means help: three fires, three whistle blasts, three piles of rocks. and think a bone is broken, call 911. This lesson is a learning tool, not medical training.

What you need

  • Padding such as moleskinmoleskin A soft padded tape sold in drugstores. Put it on skin that rubs, before it becomes a blister., tape, gauzegauze Thin, loose-woven cotton cloth used to cover a wound or pack it to stop bleeding. or folded cloth.
  • A sewing needle and clean thread, for a large blister.
  • Spare socks in a waterproof bag, and foot powder if you have it.
  • A wrap or cloth strips, and straight sticks or a board for a splint.
  • With no gear: the first aid manual says padding can be a jacket, a blanket or leafy branches, splints can be branches or a rolled magazine, and the uninjured leg can act as the splint for the hurt one.

Step by step

  1. Prevention is a routine: break in your boots before you need them, wash and massage your feet daily, trim toenails straight across, wear an insole and dry socks of the right size, powder your feet, and check them for blisters every day. Breaking in boots means wearing them on short walks first, so they shape to your feet before a long day. The survival manual also says to rest at least 10 minutes every hour, which is a good time to check your feet.
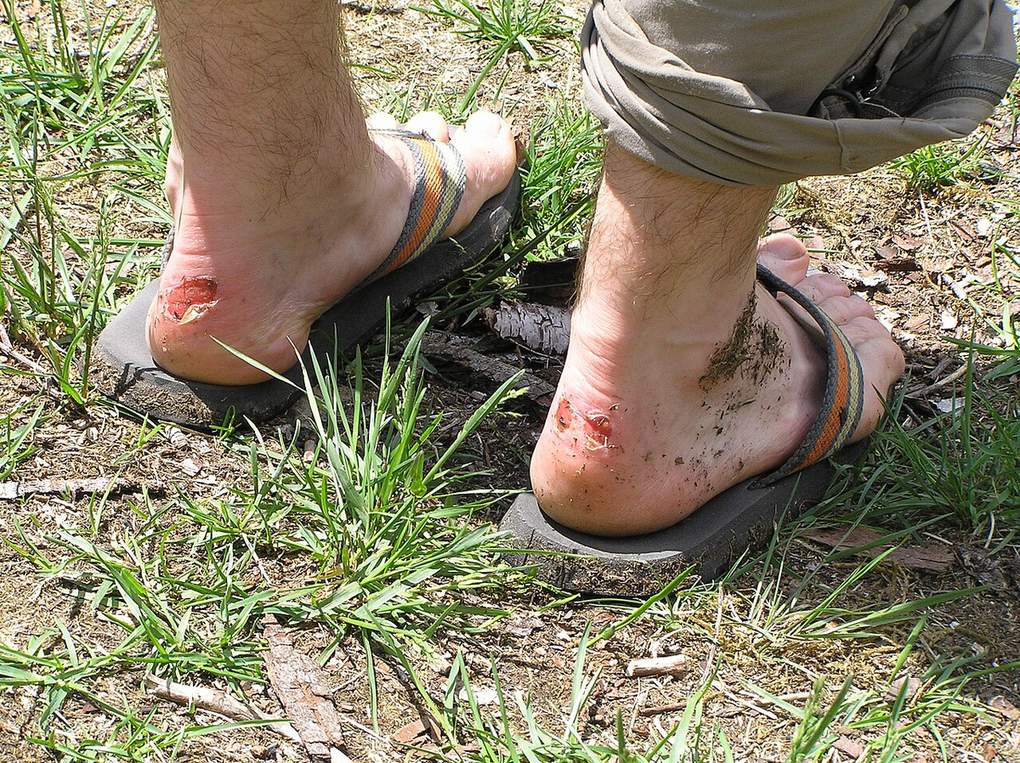
    Two heels rubbed raw and red above the straps of sandals
    Raw heels from boots that were not broken in
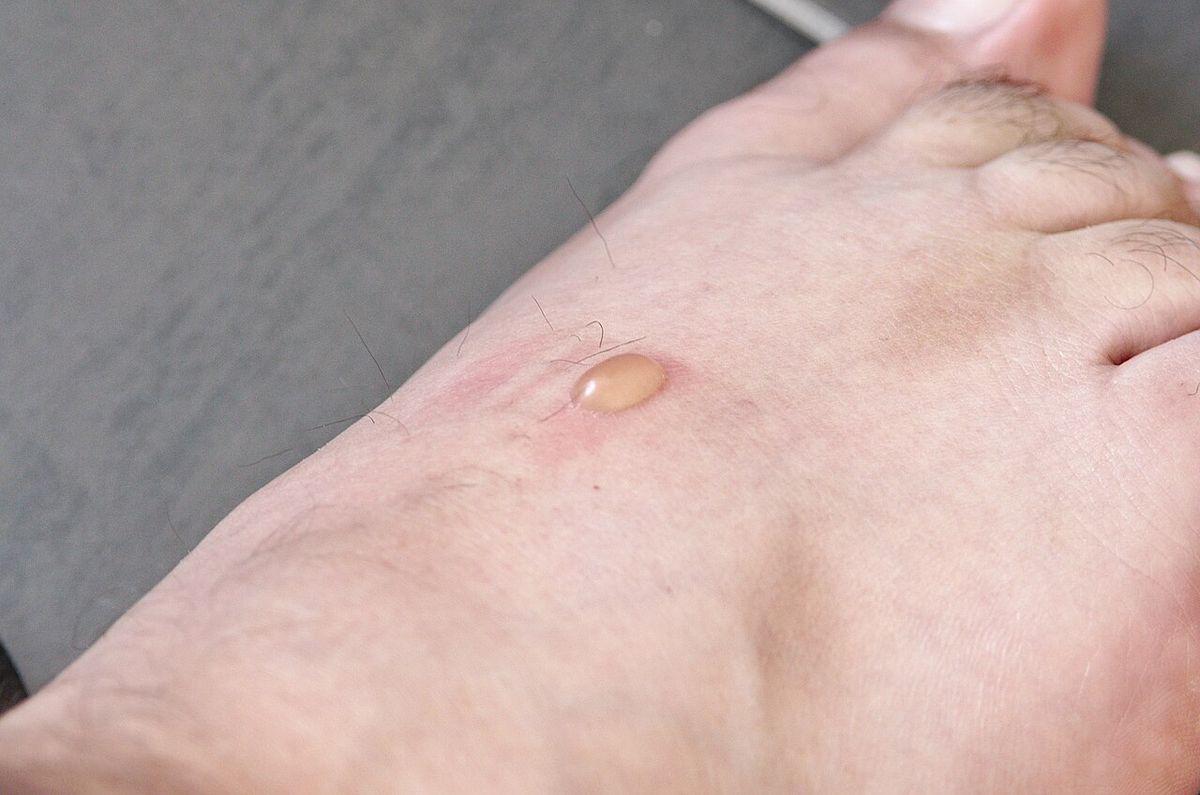
  2. A small blister: do not open it. An intact blister is safe from infectioninfection Germs growing in a wound. Watch for redness that spreads, swelling, heat, pus, a bad smell or a fever.. Pad around it to take the pressure and frictionfriction The rubbing of one thing against another. It makes heat, which is how rubbing sticks can start a fire. off. The skin over a blister acts as a natural bandage that keeps germs out. Padding around it, like a ring with a hole where the blister is, takes the rubbing off it.

    A small clear blister on the top of a foot
    A small intact blister: leave it closed and pad around it
  3. If a blister bursts, treat it as an open wound: clean and dress it daily, and keep padding around it. Open skin can get infected, so clean it, cover it with a fresh dressing every day and keep the padding around it.

  4. A large blister: leave it intact, but it may tear under pressure. The manual's method: clean it, rungame trail A narrow path worn through grass or brush by animals using it over and over. A trap goes on a trail an animal already uses. a needle with clean or sterilizedsterilized Made free of germs, usually by boiling or holding in a flame. thread through it, take the needle off and leave both ends of thread hanging out. The thread wicks the fluid out through a hole that stays open. Pad around it. Sterilized means germ-free, for example boiled. The thread soaks up the fluid and holds a tiny hole open so the blister drains slowly instead of tearing into a painful open sore.

  5. Wet feet for hours or days at temperatures just above freezing cause trench foot: pins and needles, numbness, then pain, with skin that goes white and wrinkled, then red, then blue or black. Keep your feet dry, carry spare socks in a waterproof packet, dry wet socks against your chest or back, and change socks daily. The recovery manual adds: pat wet, wrinkled feet dry instead of rubbing, loosen your boots, keep the feet warm, dry and open to the air, avoid walking on them when you can, and do not put creams on them.

  6. A sprain is an overstretched tendontendon A tough cord that ties a muscle to a bone. or ligamentligament A tough band that ties one bone to another at a joint.: pain, swelling, tenderness and bruising. The first aid manual treats sprains and dislocations the same as closed fracturesfracture A broken bone. A closed fracture stays under the skin; an open one pokes through., and says if you are not sure whether a bone is broken, treat it as broken. A tendon ties a muscle to a bone; a ligament ties one bone to another. Do not ask the person to move the hurt part to find out if it is broken; the first aid manual says that can cause more damage.

  7. Think RICE. Rest the injured area. Ice for the first 24 hours, then heat. Compression with a wrap or a splint; if possible, leave the boot on a sprained ankle unless circulation is compromised. Elevate it. RICE stands for Rest, Ice, Compression and Elevationelevation How high a spot is above sea level.. Ice means cold for the first day; after that, heat. A laced boot acts like a splint, so leave it on unless the foot below shows poor circulation.

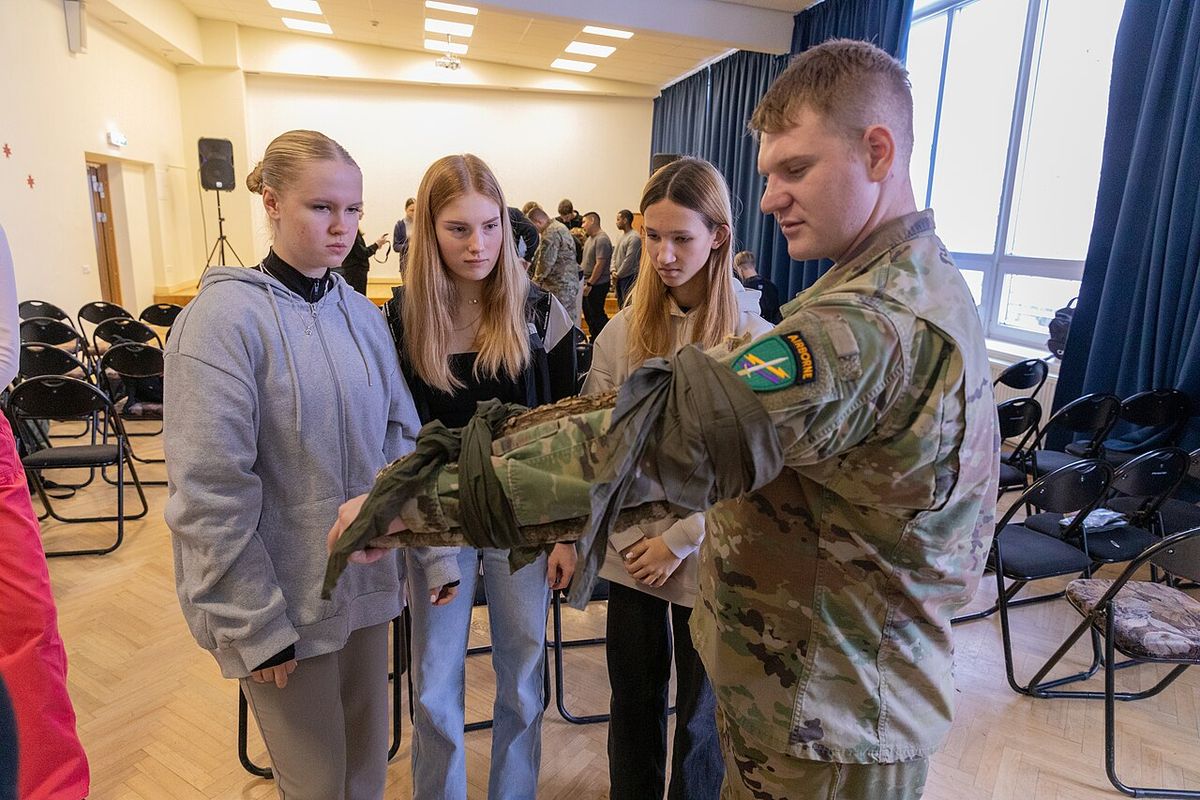
  8. Splinting rules: immobilizeimmobilize Keep a body part from moving, usually with a splint or a sling. the joints above and below the injury, pad the splint where it touches bone, and do not tie anything directly over the injured spot. Splint the injury in the position you find it; do not try to straighten it. Use at least four ties, two above and two below, with knots that will not slip, and never use wire or thin cord.

    A soldier showing students how to splint a padded arm
    Splint across the joints above and below, with padding
  9. Check circulation below the wrap after every tie and again when you are done. Pale, white or bluish skin, a nail bed that is slow to pink up after you press it, a colder foot than the other side, or numbness, tightness or tingling means it is too tight. You should be able to slip a fingertip between the wrap and the skin. Compare the hurt side with the good side: color, warmth and how fast the nail bed turns pink again after you press it. Check again after every tie, and loosen anything that fails the test.

  10. Signs of a fracture rather than a sprain: deformity, grating when it moves, inability to use it. If the area below the injury goes numb, swollen, cool or pale, a blood vessel may be damaged; rest the person for shock and get help. Grating is the sound or feeling of broken bone ends rubbing together. If bone pokes through the skin, do not push it back; cover it with a dressing. Do not move a person you think has a neck or back injury unless they are in immediate danger, such as fire. Call 911 if you have signal.

Tips from survival instructors

  • Stop as soon as you feel a hot spot on your foot and cover it. A hot spot caught early never becomes a blister.
  • Keep your feet dry and change socks often. Wet feet blister faster and can get trench foot in the cold.

Common mistakes

  • Popping a small blister. Leave it whole and pad around it.
  • Walking on a sore 'hot spot' until it becomes a blister. Stop and pad it as soon as you feel rubbing.
  • Keeping wet socks on all day. Change to dry socks and dry the wet pair inside your shirt against your chest or back.
  • Tying a splint knot right over the injury. Tie above and below it.
  • Wrapping too tight. You should be able to slip a fingertip under the wrap, and the toes should stay warm and pink.
  • Straightening a bent limb or pushing a bone back in. Splint it as it lies and get help.

Practice it safely

Start the foot routine now: wash and check your feet after every hike, trim toenails straight across, and carry spare socks in a zip bag. On a long walk, practice stopping to pad a hot spot as soon as you feel it.

With a friend at home, practice splinting an ankle or forearm with two sticks or rolled magazines, padding where they touch bone, four ties that avoid the injured spot, then do the full circulation check: color, warmth, nail bed and the fingertip under the wrap. Untie it when you are done. In a real emergency, call 911 if you have signal.

Quick check

You have sprained an ankle miles from the car. What about the boot?

  • Take it off at once
  • Leave it on unless circulation is compromised; it acts as a splint
  • Cut it off
Show the answer

Leave it on unless circulation is compromised; it acts as a splint

Take the quiz and earn the badge

The app checks your answers, keeps your place in the First aid, and works with no signal once saved.

Before you rely on thisA learning tool, not a replacement for training. In an emergency, call 911.

Sources

Photo credits
Photo: Ryan Snyder, CC BY 2.0, sourcePhoto: Clément Bucco-Lechat, CC BY-SA 3.0, sourcePhoto: U.S. Army photo by Capt. H Howey, Public Domain, source

More on first aid